Note
Explanation of how to prepare a cluster for Kubernetes, and run multicast tests.
1 Kubernetes Prerequisites
The following describes how to set up the prerequisite software and configuration files for a Kubernetes installation on a CentOS 7 cluster, the commands to set up and network Kubernetes nodes, and the tools to test multicast traffic over the Weave network overlay.
1.1 System Configuration
1.1.1 DNS configuration
Kubernetes uses the 127.0.0.1 address and if this exists in /etc/resolv.conf problems can arise when internal names are attempted to be resolved by its DNS service.
1.1.2 Firewall
Kubernetes, docker and the network overlays all add additional firewall rules to iptables. These can conflict with existing firewall rules, and possibly cause failures in services. The error logs for the control plane services in Kubernetes may mislead about what is actually going on.
This rule opened up access from the other node to the api:
-A INPUT -s 192.168.0.0/16 -p tcp -m multiport --dports 6443 -j ACCEPT
We ran into an issue where the kube-dns service was not starting properly, would eventually fail, and go into a loop doing this. The logs indicated that services were unable to talk to the Kubernetes API server.
There was also an issue was that the firewall rules we had in place would drop packets that specifically didn’t go to a subnet we expected. Since the traffic was coming from Weave, we were able to fix this by a firewall rule to accept traffic from the Weave network interface to the subnet we were interested in.
-A INPUT -s 10.0.0.0/8 -i weave -m comment --comment "100 allow access to Kubernetes API Endpoint from network overlay" -j ACCEPT
Depending on the firewall rules required for systems at your institution, you may need to add this, or additional rules.
1.1.3 Swap
In later version of Kubernets (> 1.9), you may be an error when trying to execute this command on a node which has swap enabled. It’s recommended that swap is turned off for these nodes. You can identify swap devices by looking at /proc/swaps:
# cat /proc/swaps
You can turn off all swap devices immediately by using:
# swapoff -a
removing all references from /etc/fstab, and then reboot.
1.2 Simple Installation
The repository https://github.com/lsst-dm/k8s-scripts contains the script bin/prepare.sh.
This script updates the system and installs the necessary perquisites to run the commands to install Kubernetes.
To run the script, execute the following command as root:
# k8s-scripts/bin/prepare.sh VERSION
For example, to install Kubernetes 1.9.2, execute the following:
# k8s-scripts/bin/prepare.sh 1.9.2
1.3 Detailed Installation
The above script executes the following steps:
- Update the system software:
# yum update -y
- Install docker version 1.12 and enable it as a service
# yum install -y docker
# systemctl enable docker && systemctl start docker
- Install the Kubernetes yum repository
# cat << EOF >/etc/yum.repos.d/kubernetes.repo
[kubernetes]
name=Kubernetes
baseurl=https://packages.cloud.google.com/yum/repos/kubernetes-el7-x86_64
enabled=1
gpgcheck=1
repo_gpgcheck=1
gpgkey=https://packages.cloud.google.com/yum/doc/yum-key.gpg https://packages.cloud.google.com/yum/doc/rpm-package-key.gpg
EOF
- Set permissive mode for SELinux
# setenforce 0
- Install Kubernetes utilities. As listed here, it installs verison 1.9.2. The script takes an argument, and will install whichever version you specify.
# yum install -y kubelet-1.9.2 kubeadm-1.9.2 kubectl-1.9.2
- Add option to turn off swap warning (works for Kubernetes versions < 1.9)
# KUBEADM_CONF=/etc/systemd/system/kubelet.service.d/10-kubeadm.conf
# printf '%s\n' 2i 'Environment="KUBELET_EXTRA_ARGS=--fail-swap-on=false --runtime-cgroups=/systemd/system.slice --kubelet-cgroups=/systemd/system.slice"' . x | ex $KUBEADM_CONF
- Enable and start kubelet
# systemctl enable kubelet && systemctl start kubelet
- Configure bridged packets to iptables (or ip6tables) for processing.
# cat <<EOF >  /etc/sysctl.d/k8s.conf
net.bridge.bridge-nf-call-ip6tables = 1
net.bridge.bridge-nf-call-iptables = 1
EOF
# sysctl -p /etc/sysctl.d/k8s.conf
- Some installations require ip forwarding to be explictly set:
# sysctl net.ipv4.ip_forward=1
2 Installation
When these updates have completed, the Kubernetes manager node installed. Run the following command:
# kubeadm init
You may get a warning (or in later versions an error) about “swap” needing to be disabled on your system before the complete initialization can occur. If you haven’t turned off Swap on the system, you can explicitly request this requirement to be ignored by executing the following command:
# kubeadm init --ignore-preflight-errors Swap
After executing the “init” command, you should see output similar to this:
# kubeadm init --ignore-preflight-errors Swap
[init] Using Kubernetes version: v1.9.2
[init] Using Authorization modes: [Node RBAC]
[preflight] Running pre-flight checks.
    [WARNING Swap]: running with swap on is not supported. Please disable swap
    [WARNING FileExisting-crictl]: crictl not found in system path
[certificates] Generated ca certificate and key.
[certificates] Generated apiserver certificate and key.
[certificates] apiserver serving cert is signed for DNS names [headnode.univ.edu kubernetes kubernetes.default kubernetes.default.svc kubernetes.default.svc.cluster.local] and IPs [10.96.0.1 192.168.1.2]
[certificates] Generated apiserver-kubelet-client certificate and key.
[certificates] Generated sa key and public key.
[certificates] Generated front-proxy-ca certificate and key.
[certificates] Generated front-proxy-client certificate and key.
[certificates] Valid certificates and keys now exist in "/etc/kubernetes/pki"
[kubeconfig] Wrote KubeConfig file to disk: "admin.conf"
[kubeconfig] Wrote KubeConfig file to disk: "kubelet.conf"
[kubeconfig] Wrote KubeConfig file to disk: "controller-manager.conf"
[kubeconfig] Wrote KubeConfig file to disk: "scheduler.conf"
[controlplane] Wrote Static Pod manifest for component kube-apiserver to "/etc/kubernetes/manifests/kube-apiserver.yaml"
[controlplane] Wrote Static Pod manifest for component kube-controller-manager to "/etc/kubernetes/manifests/kube-controller-manager.yaml"
[controlplane] Wrote Static Pod manifest for component kube-scheduler to "/etc/kubernetes/manifests/kube-scheduler.yaml"
[etcd] Wrote Static Pod manifest for a local etcd instance to "/etc/kubernetes/manifests/etcd.yaml"
[init] Waiting for the kubelet to boot up the control plane as Static Pods from directory "/etc/kubernetes/manifests".
[init] This might take a minute or longer if the control plane images have to be pulled.
[apiclient] All control plane components are healthy after 35.001060 seconds
[uploadconfig] Storing the configuration used in ConfigMap "kubeadm-config" in the "kube-system" Namespace
[markmaster] Will mark node headnode.univ.edu as master by adding a label and a taint
[markmaster] Master headnode.univ.edu tainted and labelled with key/value: node-role.kubernetes.io/master=""
[bootstraptoken] Using token: a24a11.0e6b932b0907deff
[bootstraptoken] Configured RBAC rules to allow Node Bootstrap tokens to post CSRs in order for nodes to get long term certificate credentials
[bootstraptoken] Configured RBAC rules to allow the csrapprover controller automatically approve CSRs from a Node Bootstrap Token
[bootstraptoken] Configured RBAC rules to allow certificate rotation for all node client certificates in the cluster
[bootstraptoken] Creating the "cluster-info" ConfigMap in the "kube-public" namespace
[addons] Applied essential addon: kube-dns
[addons] Applied essential addon: kube-proxy

Your Kubernetes master has initialized successfully!

To start using your cluster, you need to run the following as a regular user:

  mkdir -p $HOME/.kube
  sudo cp -i /etc/kubernetes/admin.conf $HOME/.kube/config
  sudo chown $(id -u):$(id -g) $HOME/.kube/config

You should now deploy a pod network to the cluster.
Run "kubectl apply -f [podnetwork].yaml" with one of the options listed at:
  https://kubernetes.io/docs/concepts/cluster-administration/addons/

You can now join any number of machines by running the following on each node
as root:

  kubeadm join --token a24a11.0e6b932b0907deff 192.168.1.2:6443 --discovery-token-ca-cert-hash sha256:1ca7fbf4d402849f34a6dbf5810ee584df015d6deeb55ca6ff1f0a87773b97f9
#
2.1 Version Message
You maybe confused by the version number in the message:
[init] Using Kubernetes version: v1.9.2
which may not reflect the version number you specified and may be a later minor release that you expect. This version number refers to the control plane of the Kubernetes system (kube-apiserver, kube-dns, etc). The kubeadm utility defaults to installing the most stable release of that point release. For example, as of this writing, installing 1.8.5 would install 1.8.7 of the control plane. It’s possible on install the exact control plane version by specifying “–kubernetes-version <version>”.
2.2 Command Permissions
Next, you have to set yourself up to run commands as a regular user. Run the following:
$ mkdir -p $HOME/.kube
$ sudo cp -i /etc/kubernetes/admin.conf $HOME/.kube/config
$ sudo chown $(id -u):$(id -g) $HOME/.kube/config
on the Kubernetes manager node in your regular user account.
2.3 Network Overlay
Next deploy the network overlay you wish to use. We’ll use the Weave overlay because it supports multicast, which is a requirement for one of the groups in the project.
$ kubectl apply -f https://cloud.weave.works/k8s/v1.7/net
serviceaccount "weave-net" created
clusterrole "weave-net" created
clusterrolebinding "weave-net" created
role "weave-net" created
rolebinding "weave-net" created
daemonset "weave-net" created
$
2.4 Adding Addition Nodes
Execute the “kubeadm join” line listed in he output of the “kubeadm init” command that ran on the head node. Note the “join” command listed above. As shown the example above, run the following on each worker node:
# kubeadm join --token a24a11.0e6b932b0907deff 192.168.1.2:6443 --discovery-token-ca-cert-hash sha256:1ca7fbf4d402849f34a6dbf5810ee584df015d6deeb55ca6ff1f0a87773b97f9
You may get an error about something failing preflight checks, most likely “Swap”. This means you’re trying to execute on a machine with Swap enabled, which is not recommended, as mentioned above. If you do see this issue and wish to continue with the system’s Swap enabled, add the option “–ignore-preflight-errors”:
# kubeadm join --token a24a11.0e6b932b0907deff 192.168.1.2:6443 --discovery-token-ca-cert-hash sha256:1ca7fbf4d402849f34a6dbf5810ee584df015d6deeb55ca6ff1f0a87773b97f9 --ignore-preflight-errors Swap
Note that the join command can be issued up to the expiration time set for the token. If you run the following as root:
# kubeadm token list

  TOKEN                     TTL       EXPIRES                USAGES                   DESCRIPTION                                                EXTRA GROUPS
  a24a11.0e6b932b0907deff   23h       2018-01-27T16:04:26Z   authentication,signing   The default bootstrap token generated by 'kubeadm init'.   system:bootstrappers:kubeadm:default-node-token
#
The TTL shows that this token will expire in 23 hours, at 16:04:26Z on January 27, 2018. If you execute the join listed above after this time, you’ll receive an error.
If you do wish to add additional nodes after this time, you can generate a new join command like so:
$ sudo kubeadm token create --print-join-command
kubeadm join --token ccd4f8.bb8a16a0bb8d6e03 172.16.1.100:6443 --discovery-token-ca-cert-hash sha256:1ca7fbf4d402849f34a6dbf5810ee584df015d6deeb55ca6ff1f0a87773b97f9
$
This creates a new token and shows the exact join command syntax you should use on the worker nodes you’d like to add.
3 Removing Nodes
To remove a node from the cluster, issue the following command:
$ kubectl delete node removethisnode.univ.edu
4 Resetting
You can reset a Kubernetes node by issuing the following command as root:
# kubeadm reset
This resets everything for the node. If the node hasn’t previously been deleted, it may show as available in the node list (kubectl get nodes), at least until things time out.
If this is done to the master node, it will lose communication with all other nodes in the cluster. A new “kubeadm init” command will need to be issued, and new “join” commands will need to be issued on all other cluster nodes. If this is done on the master node, I’ve found it to be a good policy to execute a “kubeadm reset” on all other nodes as well.
5 Multicast Testing
This is a simple test of whether or not containers on different systems can communicate with each other over multicast. Note that as of this writing, only the Weave network overlay supports multicast networking. If you do not have Weave installed, the following may not work.
Deploy a few containers, each containing development tools so that C programs can be compiled.
The test deployment I used was:
apiVersion: extensions/v1beta1
kind: Deployment
metadata:
    name: stack
spec:
    replicas: 6
    template:
        metadata:
            labels:
                app: nodes
        spec:
            containers:
            - name: stack
              image: srp3/stack:v5
              ports:
                  - containerPort: 9618
Be sure to pick two of containers which are running on different nodes. You can check which nodes a pod is running on by adding the option “-o wide” to the pod display command.
$ kubectl get pods -o wide
 NAME                     READY    STATUS    RESTARTS   AGE       IP          NODE
 stack-67dbd45764-2fbnb   1/1          Running   0          2h        10.32.0.4   srp-node1.univ.edu
 stack-67dbd45764-b4nv5   1/1          Running   0          2h        10.40.0.3   srp-node2.univ.edu
 stack-67dbd45764-k84wf   1/1          Running   0          2h        10.32.0.3   srp-node1.univ.edu
 stack-67dbd45764-nbmhf   1/1          Running   0          2h        10.40.0.4   srp-node2.univ.edu
 stack-67dbd45764-nnjww   1/1          Running   0          2h        10.40.0.2   srp-node2.univ.edu
 stack-67dbd45764-wljpg   1/1          Running   0          2h        10.32.0.2   srp-node1.univ.edu
$
Execute a shell on each container you’re testing. For example, for container “stack-67dbd45764-2fbnb” you would execute:
$ kubectl exec -it stack-67dbd45764-2fbnb /bin/sh
This runs a shell in that container, which is running on srp-node1.univ.edu
After executing shells on each container you are testing against, run the following:
Clone the following github repo:
$ git clone https://github.com/troglobit/mtools
Cloning into 'mtools'...
remote: Counting objects: 103, done.
remote: Compressing objects: 100% (48/48), done.
remote: Total 103 (delta 53), reused 103 (delta 53), pack-reused 0
Receiving objects: 100% (103/103), 46.71 KiB | 0 bytes/s, done.
Resolving deltas: 100% (53/53), done.
$ cd mtools
$ make
$
To send from a system, type:
$ ./msend
Now sending to multicast group: 224.1.1.1
Sending msg 1, TTL 1, to 224.1.1.1:4444:
Sending msg 2, TTL 1, to 224.1.1.1:4444:
Sending msg 3, TTL 1, to 224.1.1.1:4444:
To receive on another system, type:
$ ./mreceive
Receive msg 1 from 10.47.0.2:4444:
Receive msg 2 from 10.47.0.2:4444:
Receive msg 3 from 10.47.0.2:4444:
You can run multiple receive commands on different containers and all those packets should be received. Remember that since this tests a multicast protocol, some packets may be dropped or duplicated on the receiving side.
6 Dashboard
The following describes how to deploy the most current version of the Kubernetes Dashboard.
A Kubernetes dashboard can be deployed using the command:
$ kubectl apply -f https://raw.githubusercontent.com/kubernetes/dashboard/master/src/deploy/recommended/kubernetes-dashboard.yaml
secret "kubernetes-dashboard-certs" created
serviceaccount "kubernetes-dashboard" created
role "kubernetes-dashboard-minimal" created
rolebinding "kubernetes-dashboard-minimal" created
deployment "kubernetes-dashboard" created
service "kubernetes-dashboard" created
$
In order to access the dashboard with your browser on your local machine, execute the following:
$ kubectl proxy
Starting to serve on 127.0.0.1:8001
This sets up a proxy to which you will use to connect to the dashboard. Keep in mind that in order to run this from your local machine, you have to set up the kubernetes tools and the credentials for the cluster to which you are connecting.
6.1 Setting up access to the dashboard
Create the YAML file serviceaccount.yml
apiVersion: v1
kind: ServiceAccount
metadata:
  name: admin-user
  namespace: kube-system
And execute:
$ kubectl create -f serviceaccount.yml
Next, create the YAML file clusterrolebinding.yml:
apiVersion: rbac.authorization.k8s.io/v1beta1
kind: ClusterRoleBinding
metadata:
  name: admin-user
roleRef:
  apiGroup: rbac.authorization.k8s.io
  kind: ClusterRole
  name: cluster-admin
subjects:
- kind: ServiceAccount
  name: admin-user
  namespace: kube-system
execute the command:
$ kubectl create -f clusterrolebinding.yml
Now go to this page,
http://127.0.0.1:8001/api/v1/namespaces/kube-system/services/https:kubernetes-dashboard:/proxy/#!/login
And you’ll be presented with a page that looks like this.
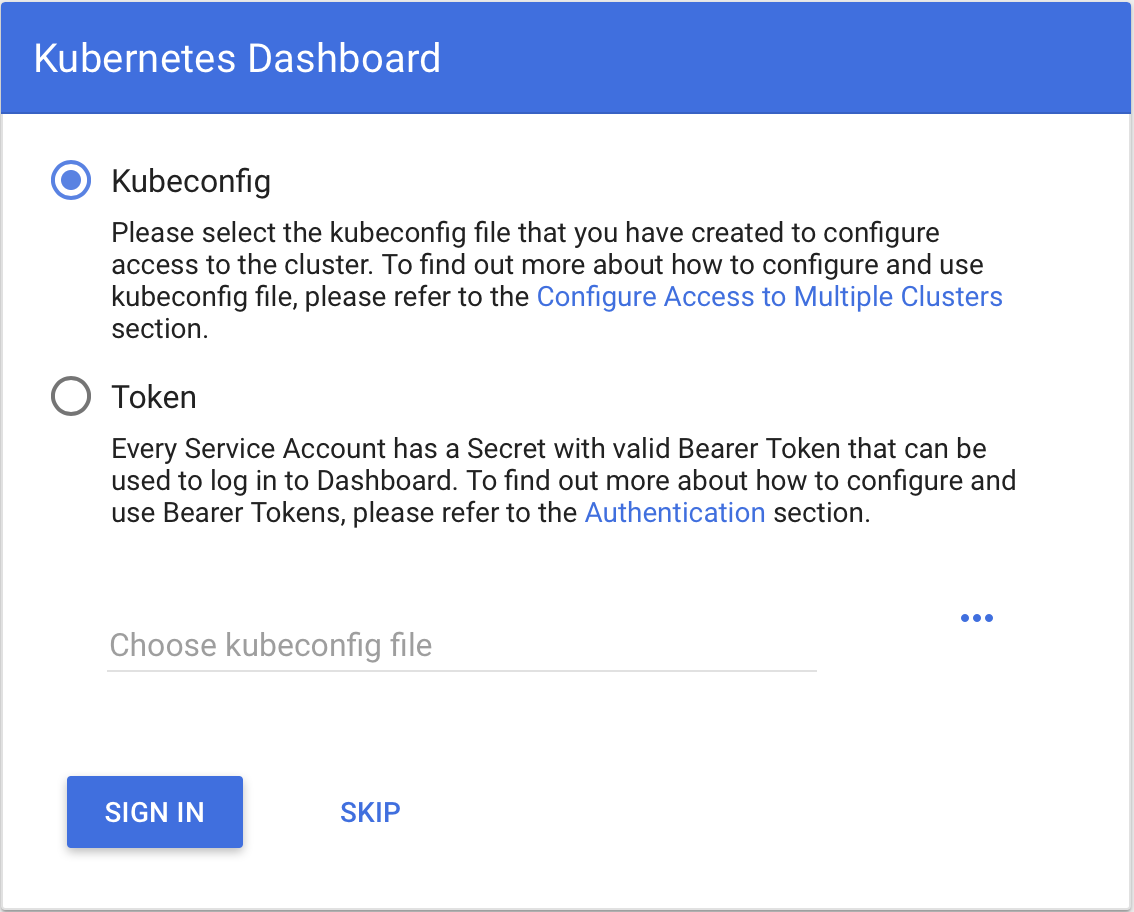
Either use the kubeconfig file, or create a token and use that. To create a token, do the following:
$ kubectl -n kube-system describe secret $(kubectl -n kube-system get secret | grep admin-user | awk '{print $1}')
Name:         admin-user-token-gztds
Namespace:    kube-system
Labels:       <none>
Annotations:  kubernetes.io/service-account.name=admin-user
              kubernetes.io/service-account.uid=9fb87e35-0dd9-11e8-bb94-00505696e251

Type:  kubernetes.io/service-account-token

Data
token:      eyJhbGciOiJSUzI1NiIsInR5cCI6IkpXVCJ9.eyJpc3MiOiJrdWJlcm5ldGVzL3NlcnZpY2VhY2NvdW50Iiwia3ViZXJuZXRlcy5pby9zZXJ2aWNlYWNjb3VudC9uYW1lc3BhY2UiOiJrdWJlLXN5c3RlbSIsImt1YmVybmV0ZXMuaW8vc2VydmljZWFjY291bnQvc2VjcmV0Lm5hbWUiOiJhZG1pbi11c2VyLXRva2VuLWd6dGRzIiwia3ViZXJuZXRlcy5pby9zZXJ2aWNlYWNjb3VudC9zZXJ2bWNlLWFjY291bnQubmFtZSI6ImFkbWluLXVzZXIiLCJrdWJlcm5ldGVzLmlvL4NlcnZpY2VhY2NvdW50L3NlcnZpY2UtYWNjb3VudC51aWQiOiI5ZmI5NmUzNS0wZGQ5LTExZTgtYmI5NC0wMDUwNTY5NmU5NTEiLCJzdWIiOiJzeXN0ZW06c2VydmljZWFjY291bnQ6a3ViZS1zeXN0ZW06YWRtaW4tdXNlciJ9.IWSHY_fSQ5hRDxdjVycinjrenUqM-aJFP_C_YnSRLFKH4YOBdtR2-Q6WO3nMRpHXCTzmQdgtuvgBmwpXuLzU3H_b4CaiqALiT7fP680CBvcGmT6ZWf9Dii7UqCgoM4c1pcmXF3u2mF4p0U6I841Pq6rdc5OpDouSBMzV_B1tzDpHQZI9-K4cRLcozgJqZcoeQSQ7t6Ufpaai_u31uPYRdo7YSlrmGAzx47hzT5Zg0YErp6KCcUqu3shpEd2GbIE_I5FVQ7edzg04r37s0JewA8ZJnBC5cUsjaT0D6yx7KPyIRuXtyB66jw1yIf0MAcO_LrGjbfP90FDV9rTrbjbc2A
ca.crt:     1025 bytes
namespace:  11 bytes
$
Copy and paste the token (no spaces!) into the token field in the dialog, and then click the “Sign In” button. You should now be logged in.
Further details on using the Dashboard are available here:
https://github.com/kubernetes/dashboard/wiki/Accessing-dashboard
6.2 Dashboard Issues you may run into
6.2.1 Errors when deploying dashboard
If you’re trying to apply the dashboard and you get output like this:
$ kubectl apply -f https://raw.githubusercontent.com/kubernetes/dashboard/master/src/deploy/recommended/kubernetes-dashboard.yaml
secret "kubernetes-dashboard-certs" configured
serviceaccount "kubernetes-dashboard" configured
service "kubernetes-dashboard" configured
unable to decode "https://raw.githubusercontent.com/kubernetes/dashboard/master/src/deploy/recommended/kubernetes-dashboard.yaml": no kind "Role" is registered for version "rbac.authorization.k8s.io/v1"
unable to decode "https://raw.githubusercontent.com/kubernetes/dashboard/master/src/deploy/recommended/kubernetes-dashboard.yaml": no kind "RoleBinding" is registered for version "rbac.authorization.k8s.io/v1"
unable to decode "https://raw.githubusercontent.com/kubernetes/dashboard/master/src/deploy/recommended/kubernetes-dashboard.yaml": no kind "Deployment" is registered for version "apps/v1beta2"
It may be because the client version of the software you’re using (say on a laptop) is out of date.
6.2.2 Error reaching the dashboard
If you can’t reach the dashboard, be sure you’re running:
$ kubectl proxy
Starting to serve on 127.0.0.1:8001
in another window. Keep in mind this needs to execute on the same machine from which you launch the browser. Use the 127.0.0.1 address, and not localhost (even though that’s a conventional name to use for that IP address). Some installations don’t specify it, and you’ll get an error trying to reach localhost. That’s because it can’t resolve the localhost name, not because the service proxy isn’t running.
7 Registry
There are a number of ways to deploy a local registry, and this is a quick and simple example of setting one up. This makes it appear that the registry is always accessible from localhost, and uses port forwarding to drive traffic to the real registry location.
- On the master node, create the registry:
$ kubectl create -f yml/registry.yml
- Set up a port-forwarding
$ POD=$(kubectl get pods --namespace kube-system -l k8s-app=kube-registry-upstream -o template --template '{{range .items}}{{.metadata.name}} {{.status.phase}}{{"\n"}}{{end}}' | grep Running | head -1 | cut -f1 -d' ')
$ nohup kubectl port-forward --namespace kube-system $POD 5000:5000 &
- Copy the admin.conf file from the head node to the rest of the cluster
$ ssh node-name-goes-here mkdir .kube
$ scp ~/.kube/config node-name-goes-here:.kube/config
4 On each worker node:
$ kubectl create -f yml/node-redirect.yml
$ POD=$(kubectl get pods --namespace kube-system -l k8s-app=kube-registry-upstream -o template --template '{{range .items}}{{.metadata.name}} {{.status.phase}}{{"\n"}}{{end}}' | grep Running | head -1 | cut -f1 -d' ')
$ nohup kubectl port-forward --namespace kube-system $POD 5000:5000 &
7.1 Things to note
The example assumes that /storage has already been created on your systems; if you used this on a more permanent basis (rather than), you’d want this backed by a shared file system mounted under /storage so wherever the container ran, it would have access to it.
The port forwarding forwards from external port 5000 to internal port (in the container) 5000. The port 5000 might be in use by another process (like nuttcp). You can change the port-forwarding to another port changing the external port. For example, this forwards from external port 5002 to internal port 5000:
$ nohup kubectl port-forward --namespace kube-system $POD 5002:5000 &
7.2 To test
- Pull down an image from dockerhub
$ docker pull repo/container:version
- Tag it
$ docker tag repo/container:version localhost:5000/mycontainer
- Push the tagged version to the local registry
$ docker push localhost:5000/mycontainer
- Remove the tagged version
$ docker rmi localhost:5000/mycontainer
- Remove the image pulled from dockerhub
$ docker rmi repo/container:version
Pod should now be available through local docker registry. Pods should now be able to be deployed, referencing the local registry.
# example
apiVersion: v1
kind: Pod
metadata:
  name: mycontainer
spec:
  containers:
  - name: mycontainer
    image: localhost:5000/container